
Check this first
Screen pressure damage is more likely when a black blotch, white mark, bright spot, line cluster, internal-looking crack, or touch problem appears after a squeeze, bend, closed-lid object, tight bag, fall, or direct pressure on the panel. Treat it as possible physical damage if the mark stays in the same place while content changes.
Do not press, flex, heat, cool, or keep stress-testing the area to see if it changes. Use controlled browser tests only to compare the pattern, then preserve access, take a clear photo if repair or coverage may matter, and contact the manufacturer, retailer, repair provider, school IT, or insurer when the display is worsening or hard to trust.
What to decide first
- Does the mark stay fixed on the panel, or does it appear in screenshots and on another display too?
- Does the pattern match a pressure sign, or a look-alike such as a single pixel, edge glow, retained image, surface mark, water, heat, cracked glass, or software output?
- Is the device still usable long enough to back up, connect an external monitor, or document the symptom?
- Do you need a device-specific guide, a symptom guide, or a repair and coverage decision?
Check the pattern without stressing the screen
The safest useful checks do not involve touching the damaged area. They are meant to separate panel damage from content, software output, a single pixel, or a surface mark before you choose repair, documentation, or a more specific ScreenDetect path.
Safe checks that change the decision
Step 1
Physical context
Closed-lid objects, camera or keyboard covers, tight laptop bags, drops, bends, case pressure, or a tablet being crushed make pressure damage more plausible. Without a pressure event, keep software, cable, pixel, heat, water, and surface causes in the comparison.
Step 2
Panel check
Switch between white, black, red, green, blue, and normal content. A physical panel mark usually stays in the same location as the image changes. Stop if lines spread, touch becomes unreliable, or the display becomes harder to read.
Step 3
Output check
If the mark appears in a screenshot or on an external monitor, do not call it panel pressure damage yet. Restart once, compare on another display if available, and treat software, GPU, driver, or system output as possible until the hardware is inspected.
Step 4
Evidence
Take one clear photo with the pattern visible, note the event and date, and back up important files while the device still works. A photo is not a manufacturer diagnosis, but it helps you explain the issue to repair, warranty, school, IT, return, or insurance contacts.
What pressure damage can look like
Manufacturer support pages do not use one universal label for pressure damage. HP describes damaged screens with lines, patterns, black spots, white spots, and blotches. Sony lists lines, blotches, bleeding, cracks, moisture, and color distortion as possible physical LCD damage. Samsung notes that gradual pressure can leave the front glass intact while damaging the screen underneath. The practical point is to judge the visible pattern together with the recent physical event.
Pattern you see
- What it can mean
- A localized dark area after pressure can point to damaged panel layers under the surface.
- What to check
- If it is one tiny dot, run the Pixel Test. If it is a broader patch, open Dark spots after damage.
Pattern you see
- What it can mean
- HP describes white spots or lighter localized areas as possible contact-force damage on LCD screens.
- What to check
- If the bright area is strongest near an edge on black, compare it with the Backlight Bleed Test.
Pattern you see
- What it can mean
- Lines after a lid mistake, twist, squeeze, or transport pressure can point to panel damage, but cables and graphics output can also cause lines.
- What to check
- Open Lines after pressure if lines are the main symptom.
Pattern you see
- What it can mean
- Samsung's support material notes that pressure can damage the screen underneath even when the front glass remains intact.
- What to check
- Compare with Internal screen damage vs cracked glass, especially before a repair or coverage claim.
Swipe table to view all columns.Scroll table to view all columns.
| Pattern you see | What it can mean | What to check |
|---|---|---|
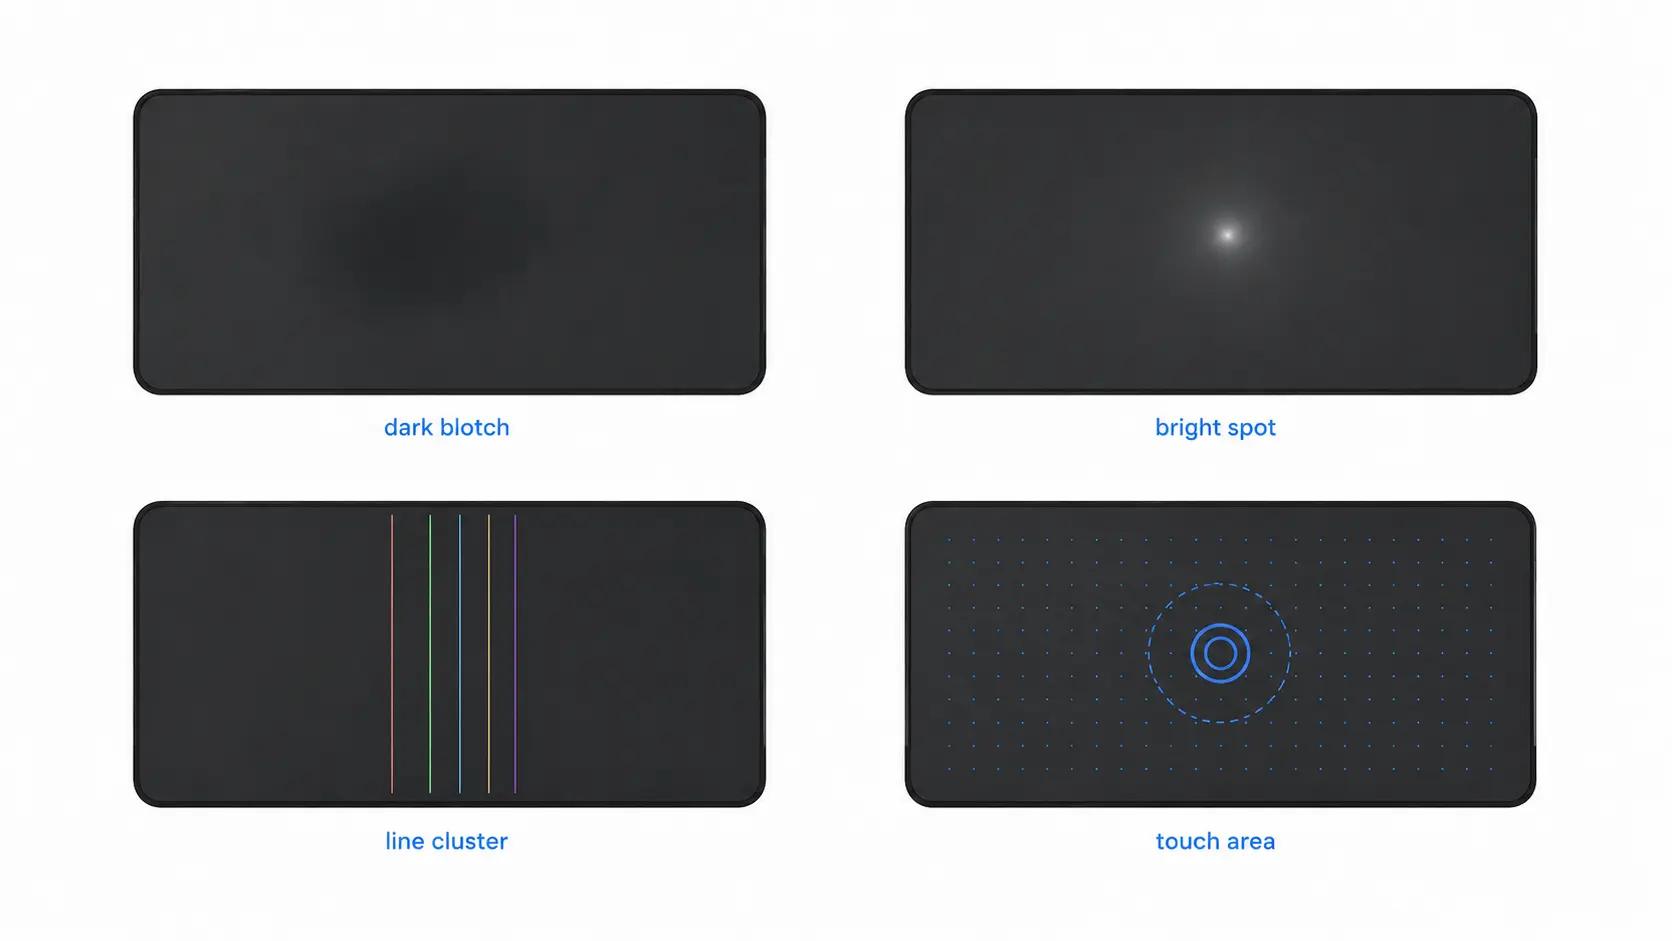
| Black spot, dark blotch, ink-like bruise, or bleeding pixels | A localized dark area after pressure can point to damaged panel layers under the surface. | If it is one tiny dot, run the Pixel Test. If it is a broader patch, open Dark spots after damage. |
| White pressure mark, bright spot, or cloudy patch | HP describes white spots or lighter localized areas as possible contact-force damage on LCD screens. | If the bright area is strongest near an edge on black, compare it with the Backlight Bleed Test. |
| Colored vertical or horizontal line cluster | Lines after a lid mistake, twist, squeeze, or transport pressure can point to panel damage, but cables and graphics output can also cause lines. | Open Lines after pressure if lines are the main symptom. |
| Internal-looking crack, distortion, or touch issue under smooth glass | Samsung's support material notes that pressure can damage the screen underneath even when the front glass remains intact. | Compare with Internal screen damage vs cracked glass, especially before a repair or coverage claim. |
Look-alikes that change the decision
A pressure mark is not the only reason a screen can show dots, glow, retained images, lines, or dark areas. Use this comparison before you assume the panel was physically damaged.
What you see
- It may be
- Dead, stuck, or hot pixel
- Useful check
- Run the Pixel Test. A single dot is different from a pressure bruise.
What you see
- It may be
- Software, GPU, driver, or system output issue
- Useful check
- Restart once and compare on another display. Do not press or flex the panel as a test.
What you see
- It may be
- Backlight bleed or IPS glow
- Useful check
- Run the Backlight Bleed Test. Pressure marks are usually more localized or irregular.
What you see
- It may be
- Burn-in or image retention
- Useful check
- Run the Burn-In Test. Pressure damage usually follows a physical event.
What you see
- It may be
- Surface mark, protector bubble, residue, or coating issue
- Useful check
- Power down and clean gently. If the mark remains under the glass or pixels, return to the damage checks.
What you see
- It may be
- Water damage
- Useful check
- Open the screen water damage guide before treating it as pressure.
What you see
- It may be
- Heat damage
- Useful check
- Open the screen heat damage guide before treating it as pressure.
Swipe table to view all columns.Scroll table to view all columns.
| What you see | It may be | Useful check |
|---|---|---|
| One tiny black, white, red, green, or blue dot | Dead, stuck, or hot pixel | Run the Pixel Test. A single dot is different from a pressure bruise. |
| The mark appears in screenshots or on another display | Software, GPU, driver, or system output issue | Restart once and compare on another display. Do not press or flex the panel as a test. |
| Glow strongest near an edge or corner on a dark screen | Backlight bleed or IPS glow | Run the Backlight Bleed Test. Pressure marks are usually more localized or irregular. |
| A faint app, logo, taskbar, keyboard, or UI shape remains after switching content | Burn-in or image retention | Run the Burn-In Test. Pressure damage usually follows a physical event. |
| The mark wipes away, changes with a protector, or sits on top of the glass | Surface mark, protector bubble, residue, or coating issue | Power down and clean gently. If the mark remains under the glass or pixels, return to the damage checks. |
| The timing matches liquid, rain, condensation, or a spill | Water damage | Open the screen water damage guide before treating it as pressure. |
| The issue follows overheating, direct sun, hot car exposure, or blocked vents | Heat damage | Open the screen heat damage guide before treating it as pressure. |
Choose by device, symptom, or access risk
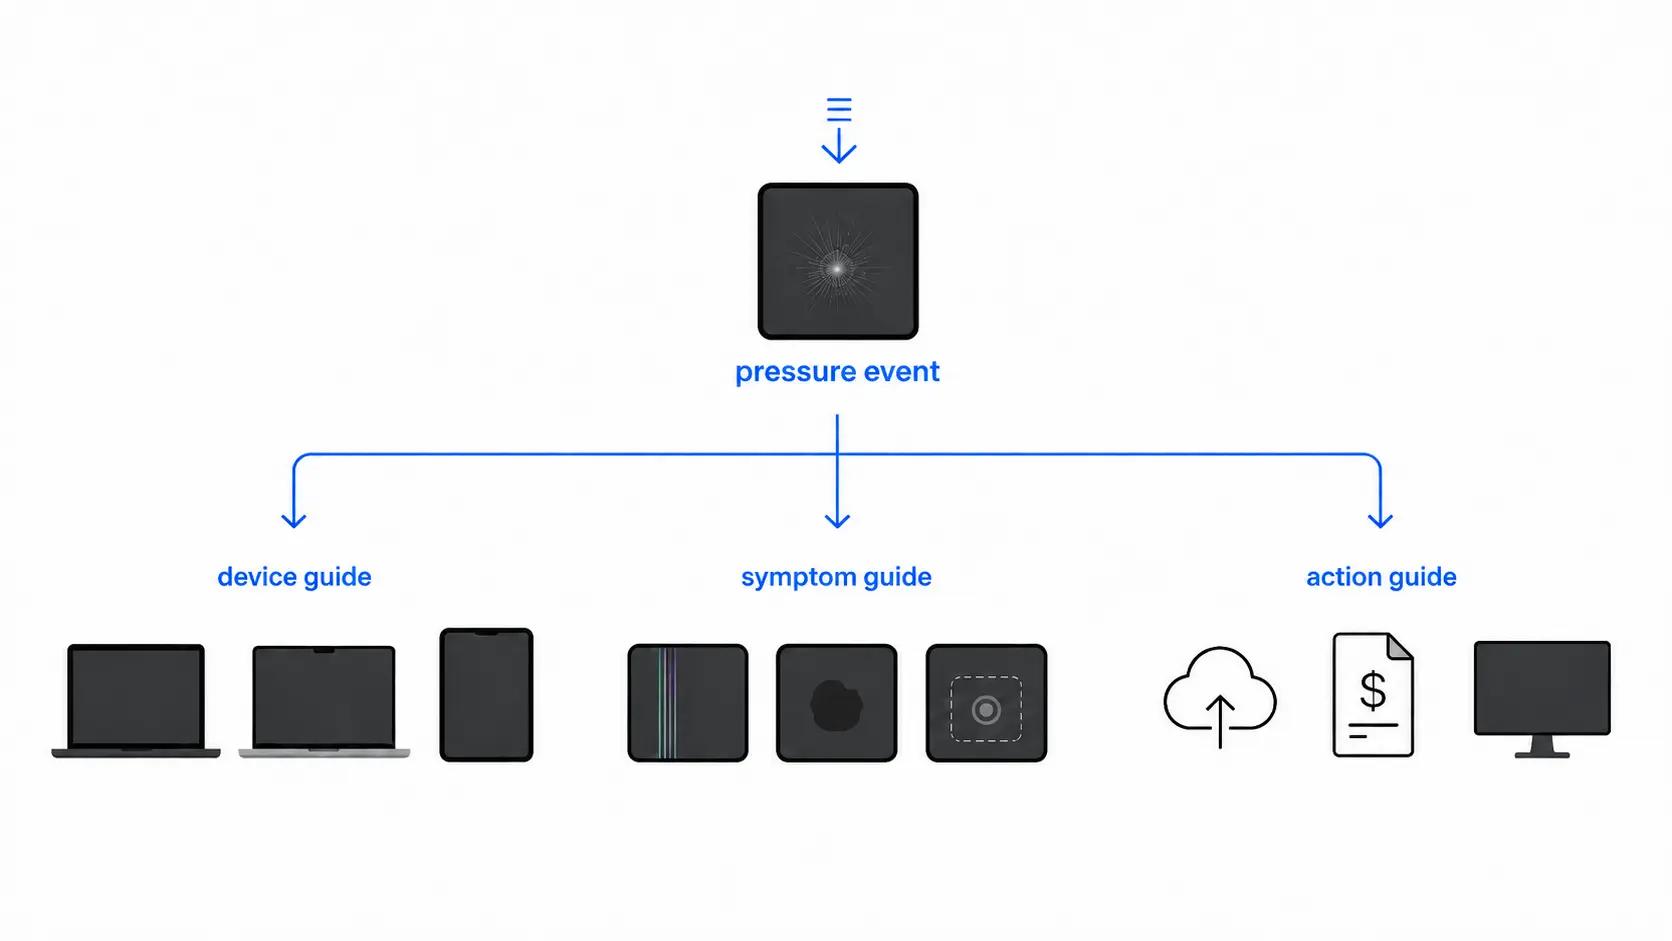
The broad pressure check is only the start. Once the pattern is clear, use the path that changes your next decision.
- MacBook, MacBook Air, or MacBook Pro: open MacBook screen pressure damage for closed-lid objects, camera covers, keyboard covers, tight display clearance, and MacBook repair context.
- Windows laptop, Chromebook, gaming laptop, or work laptop: open Laptop screen pressure damage for backpack pressure, hinge-area stress, external monitor access, repair quotes, and replacement decisions.
- iPad or tablet: open iPad screen pressure damage for white spots, black marks, case pressure, screen protector confusion, and touch behavior.
- Symptom is clearer than the device: use Lines after pressure, Dark spots after damage, or Touch dead zones after screen damage.
- Access, evidence, or cost is now the main problem: use external monitor access, screen damage documentation, or repair vs replacement instead of doing more screen tests.
Preserve access and evidence before repair
Once the pattern looks physical, the useful work is protecting access and making the repair or coverage conversation easier. More tests do not repair panel layers.
- Back up important files, photos, passwords, school work, or work documents while the device still unlocks or boots.
- For a laptop, use an external monitor if the built-in screen is unreliable but the computer still runs.
- If repair, return, warranty, school IT, or insurance may matter, document the screen damage with one clear photo, the date, the device model, and what happened.
- Check current warranty, return, repair, or protection-plan terms before paying for service. Physical damage decisions depend on the device, provider, plan, inspection, and region.
Common questions
What does screen pressure damage look like?
It can look like a black blotch, ink-like bruise, white pressure mark, bright spot, colored line cluster, internal-looking crack, bleeding pixels, or a touch problem after a squeeze, bend, bag-pressure event, closed-lid object, or direct pressure on the panel.
Can pressure damage be fixed with software?
Usually no. If the visible change follows a physical pressure event and stays fixed on the display, software resets and browser tests cannot repair damaged panel layers. Use tests to compare the pattern, not to force a fix.
What should I do first if the screen still works?
Back up important files, avoid pressing or flexing the damaged area, and take one clear photo if repair, warranty, return, school IT, or insurance may matter. For a laptop, move to an external monitor if the built-in screen is hard to trust.
Is it pressure damage if it shows in a screenshot or on an external monitor?
Not necessarily. If the mark appears in screenshots or on another display, software, GPU, driver, or system output may be involved. Restart once and compare on another display before assuming the panel itself is bruised.
Is one tiny black or colored dot pressure damage?
Not usually. One tiny dot is more likely a dead, stuck, or hot pixel. Run the Pixel Test before treating a single dot like a pressure bruise.
Is edge or corner glow pressure damage?
Often no. Edge or corner glow on a dark screen is usually closer to backlight bleed or IPS glow. Run the Backlight Bleed Test if the glow is strongest near the bezel instead of shaped like a localized pressure mark.
Can pressure damage happen without cracked glass?
Yes. The outside glass can look mostly intact while the display layers underneath show a bruise, bright spot, line cluster, bleeding pixels, or internal-looking crack.
Which ScreenDetect path should I use?
Use the MacBook pressure guide for Apple laptops, the laptop pressure guide for Windows laptops and Chromebooks, the iPad pressure guide for tablets, and the symptom guides when lines, dark spots, or touch behavior are the clearest problem.
Related guides
For closed-lid object pressure, camera or keyboard covers, bag compression, and MacBook-specific repair context.
For Windows laptops, Chromebooks, gaming laptops, work laptops, backpack pressure, hinge-area stress, and repair quotes.
For iPad or tablet white spots, black marks, case pressure, screen protector confusion, and touch behavior.
For new vertical, horizontal, colored, or flickering lines after transport pressure, twisting, or a squeeze event.
For a dark patch, black spot, ink-like bruise, or blotchy area that is more obvious than the pressure event.
For missing touch, delayed response, or ghost taps near the damaged area.
For one tiny dot that may be a dead, stuck, or hot pixel rather than a broader pressure mark.
For edge or corner glow on a dark screen.
For a retained app, logo, taskbar, keyboard, or UI shape that remains after switching content.
For a laptop that still runs when the built-in display is too unstable to trust.
For comparing repair quote, device value, access risk, and replacement options.
For saving a clear photo, date, device model, and short event note before contacting repair, return, school IT, warranty, or insurance support.
Sources
- Using a camera cover, palm rest, or keyboard cover on a Mac notebook
Apple Support · Apple says material left between the display and keyboard can interfere with a closed Mac notebook display and damage it because clearance is tight.
- Important safety information for iPad
Apple Support · Apple says iPad can be damaged if crushed and recommends contacting Apple or an Apple Authorized Service Provider if iPad is damaged or malfunctions.
- HP PCs and Monitors - Damaged screen, LCD, or display
HP Support · HP describes damaged screens with lines, patterns, black spots, white spots, and blotches, warns against DIY screen repair, and notes external monitor access for notebooks.
- Cracked or bleeding screen on Galaxy phone or tablet
Samsung Support · Samsung says physical screen damage can look like cracks, ink spots, or bleeding pixels, and that gradual pressure can damage the screen underneath intact glass.
- How to determine if a notebook LCD screen has physical damage
Sony · Sony lists lines, blotches, bleeding, cracks, moisture, and color distortion as possible physical LCD damage indicators.
- Types of Damages Not Covered by Dell Basic Support
Dell Support · Dell lists accident, abuse, and misuse as non-covered under basic support terms and includes LCD pressure-mark and surface-abrasion examples.